Difference between revisions of "New Player Guide: Introduction to the Interface"
m |
m (removing page title) |
||
| (2 intermediate revisions by one other user not shown) | |||
| Line 1: | Line 1: | ||
| − | [[Image:Play guide banner.jpg|center]] | + | [[Image:Play guide banner.jpg|center|alt=New Player Guide - UOGuide|link=]] |
| − | + | __NOTITLE__ | |
{{tocright|2}} | {{tocright|2}} | ||
==Introduction to the Interface== | ==Introduction to the Interface== | ||
After you've finished with Gwen, you'll finally be able to move around freely. You will notice that your character is always in the center of the playing screen. | After you've finished with Gwen, you'll finally be able to move around freely. You will notice that your character is always in the center of the playing screen. | ||
| + | |||
{| cellpadding="10" style="border: 1px solid darkgray;" | {| cellpadding="10" style="border: 1px solid darkgray;" | ||
| Line 33: | Line 34: | ||
|[[Enhanced Client]] - It can be used to open [[#Paperdoll|Paperdoll]], [[#Skills Menu|Skills Window]], [[#Quest Journal|Quest Journal]], [[#Virtues Menu|Virtues Menu]], [[#Chat|Chat Window]], [[#Guild|Guild Window]], [[#Map|Map]], [[#Options|Options]] and [[#Backpack|Backpack]]. | |[[Enhanced Client]] - It can be used to open [[#Paperdoll|Paperdoll]], [[#Skills Menu|Skills Window]], [[#Quest Journal|Quest Journal]], [[#Virtues Menu|Virtues Menu]], [[#Chat|Chat Window]], [[#Guild|Guild Window]], [[#Map|Map]], [[#Options|Options]] and [[#Backpack|Backpack]]. | ||
|} | |} | ||
| + | |} | ||
| + | |||
| + | |||
| + | {| cellpadding="10" style="border: 1px solid darkgray;" | ||
| + | | width="80px" valign="top" | | ||
| + | ===Shortcuts=== | ||
| + | [[File:Sign post.png|center]] | ||
| + | | valign="top" | | ||
| + | The shortcut keys on this guide are Classic Client default key-bindings, also known as the Legacy defaults. If you are using Enhanced Client, you can set your key-bindings to Legacy defaults by clicking on the ''Main Menu'' icon: [[File:Guide_EC_options_icon.jpg]] , selecting ''User Settings'' and then checking ''Legacy Chat Mode'' option inside the'' Legacy'' Tab. | ||
|} | |} | ||
Latest revision as of 12:50, 9 January 2016

Introduction to the Interface
After you've finished with Gwen, you'll finally be able to move around freely. You will notice that your character is always in the center of the playing screen.
Moving |
To travel, simply move the mouse over the game world display, then right click and hold. The mouse cursor will always point away from your character, who will move in the indicated direction (for example, if you wish to walk up the screen, hold the cursor above your character). You will continue to head in that direction until you come to an obstruction or release the mouse button. The further away the cursor is from the character, the faster the character will move. Double right-clicking will cause your character to move to the exact point where the cursor was. |
Player Quick Menu |
You may notice a small arrow icon near the top or bottom of the screen, clicking on that will reveal the Player Quick Menu which can be used to open further useful displays. It cannot be closed by right clicking, but can be condensed by clicking the arrow again. | ||||
| |||||
Paperdoll |
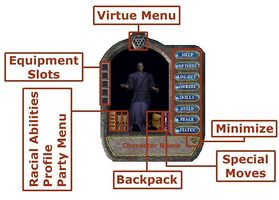
The Paperdoll is one of the most important and commonly used menu in the game. You used it to change your character clothing and equipment and you can also access other important menus. |
|
| |
Backpack |
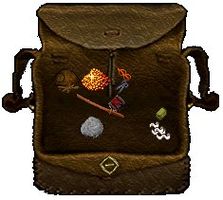
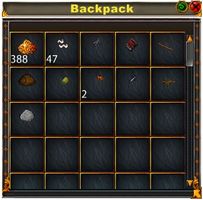
The Backpack serves as the primary storage for individual characters. The Backpack is always displayed in the Paperdoll. To open the Backpack, click it in the Player Quick Menu or the Paperdoll window or use the default keyboard command, Alt + I. If you have the Paperdoll and Backpack open, you can equip/unequip your character by dragging items from one display to the other. Likewise, many items in the game world can be picked up by dragging them into your pack. |
| |
Map |
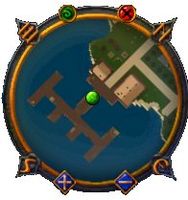
Clicking on Map will bring up a small map (or "Radar" view) of your immediate area. The Map may alternatively be opened by holding Alt + R. |
| |
Journal |
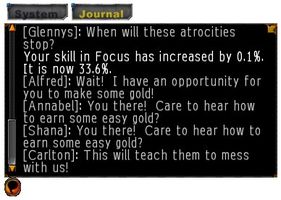
Journal will reveal a small scroll of text which helps keeping track of conversations. To scroll text back and forth, left click and hold the ribbon to the right of the scroll and move it up or down. To enlarge or shrink the journal, left click and hold the tab on the base of the scroll and move that up or down. |
| |
Chat |
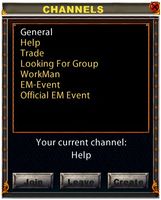
Clicking on Chat icon opens a chat window. From here you can join a conference, if one is available, or create your own. Frankly, the Chat screen is seldom used in UO as most players either talk directly to one another, use guild or party chat, or 3rd party programs such as ICQ or Teamspeak. |
| |
Options |
You can change the client settings like control keys, game resolution, frame-rate and sound volume from the options menu. Below is a list of recommended settings for each client: |
| |
Previous: First Step to Ultima Online |
Next: Basics |


